Alright, we’ve got the hang of how to set up a repository – well done! Now, lets take a brief tour around Fork, pointing out the basic operations that we’ll need as we go. Or – if you have no idea what I’m talking about, might be worth starting at part one of this series.
When you look at your repository in Fork, you’ll see a graphical representation of each commit. Each dot there is a commit (a group of changes), colour-coded and connected by a branch. Branches are a way to separate different features so that they can be worked on over time without interacting with each other, until they are ready.
Branches are a fairly core concept for Git, so it pays to ensure you understand why to use them. Lets say I’m working on a large new feature that might break the project until it’s finished. I’ll want to create my own branch, and make all my changes in that branch until I know it’s tested and ready to be re-added to the main branch. At that point, I will merge my branch into the main branch, reunifying my work with any other work being done by the rest of the team.
Switching Branches
When you want to head to a new branch, this is called “Checking Out” that branch. Checking Out a branch will switch your local copy of the repository to that branch, so your game will be running on that branch. You can view all of the branches on the left of Fork, including Remote branches (branches that exist on the server, but not on your remote machine, yet).
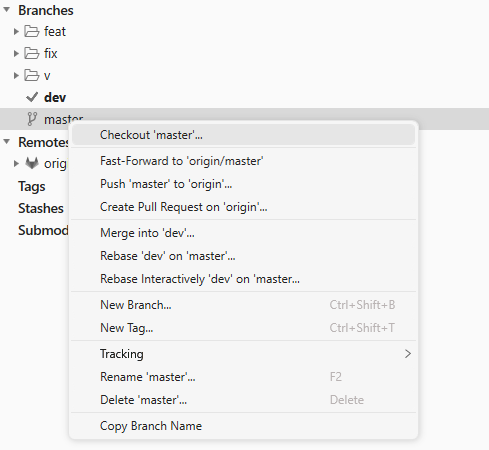
Checking Out a branch is very easy in Fork. Simply right click the branch, and select ‘Checkout’. Or, if you want to save a few clicks, you can simply double click the name of the branch.
If you want to make a new branch, this is fairly easy to do as well. Simply click the ‘New Branch’ button, enter the branch name, and select whether you want to check out the new branch or not. Then click create, and there you go – branched.
Pulling Branches
Pulling is another fundamental concept of Git which it pays to understand. When other people make changes, those changes will get pushed to the server. If you want those changes on your local machine, you need to pull them.
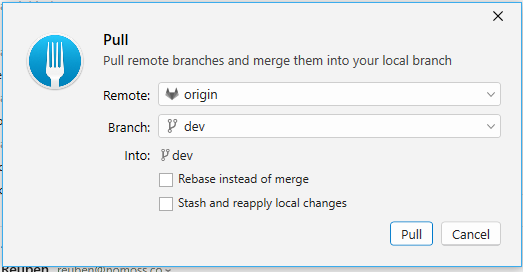
Luckily, pulling is very easy, just click the ‘Pull’ button in Fork. It’ll pop up a dialog box to confirm which branch you want to pull, and from where, but for most cases you can simply click ‘Pull’ and not worry about it too much. Fork will default to pulling the branch you are on, but you can also select a different branch from this dialog to pull it instead.
Making Commits
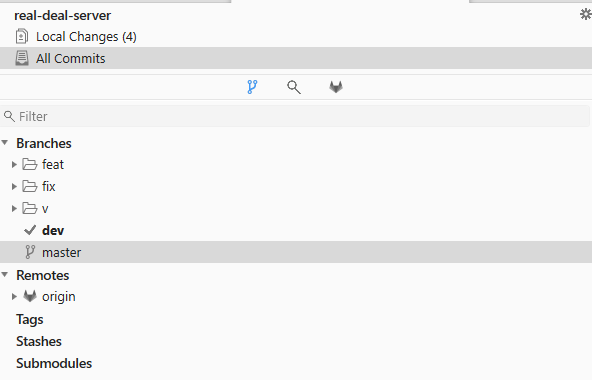
We’ve already covered the concept of a Commit, so next lets figure out how to actually make one! Once you’ve made some changes to your repository, you’ll see a number of changes appear in Fork, next to the ‘Local Changes’ option on the left menu. This shows you how many uncommitted changes you currently have.
Clicking on ‘Local Changes’ will change the view to show you these changes in more detail. From this screen, you can decide which changes you want to stage (e.g. prepare to commit). If you want to stage a change to a file, simply click that file and click the Stage button.
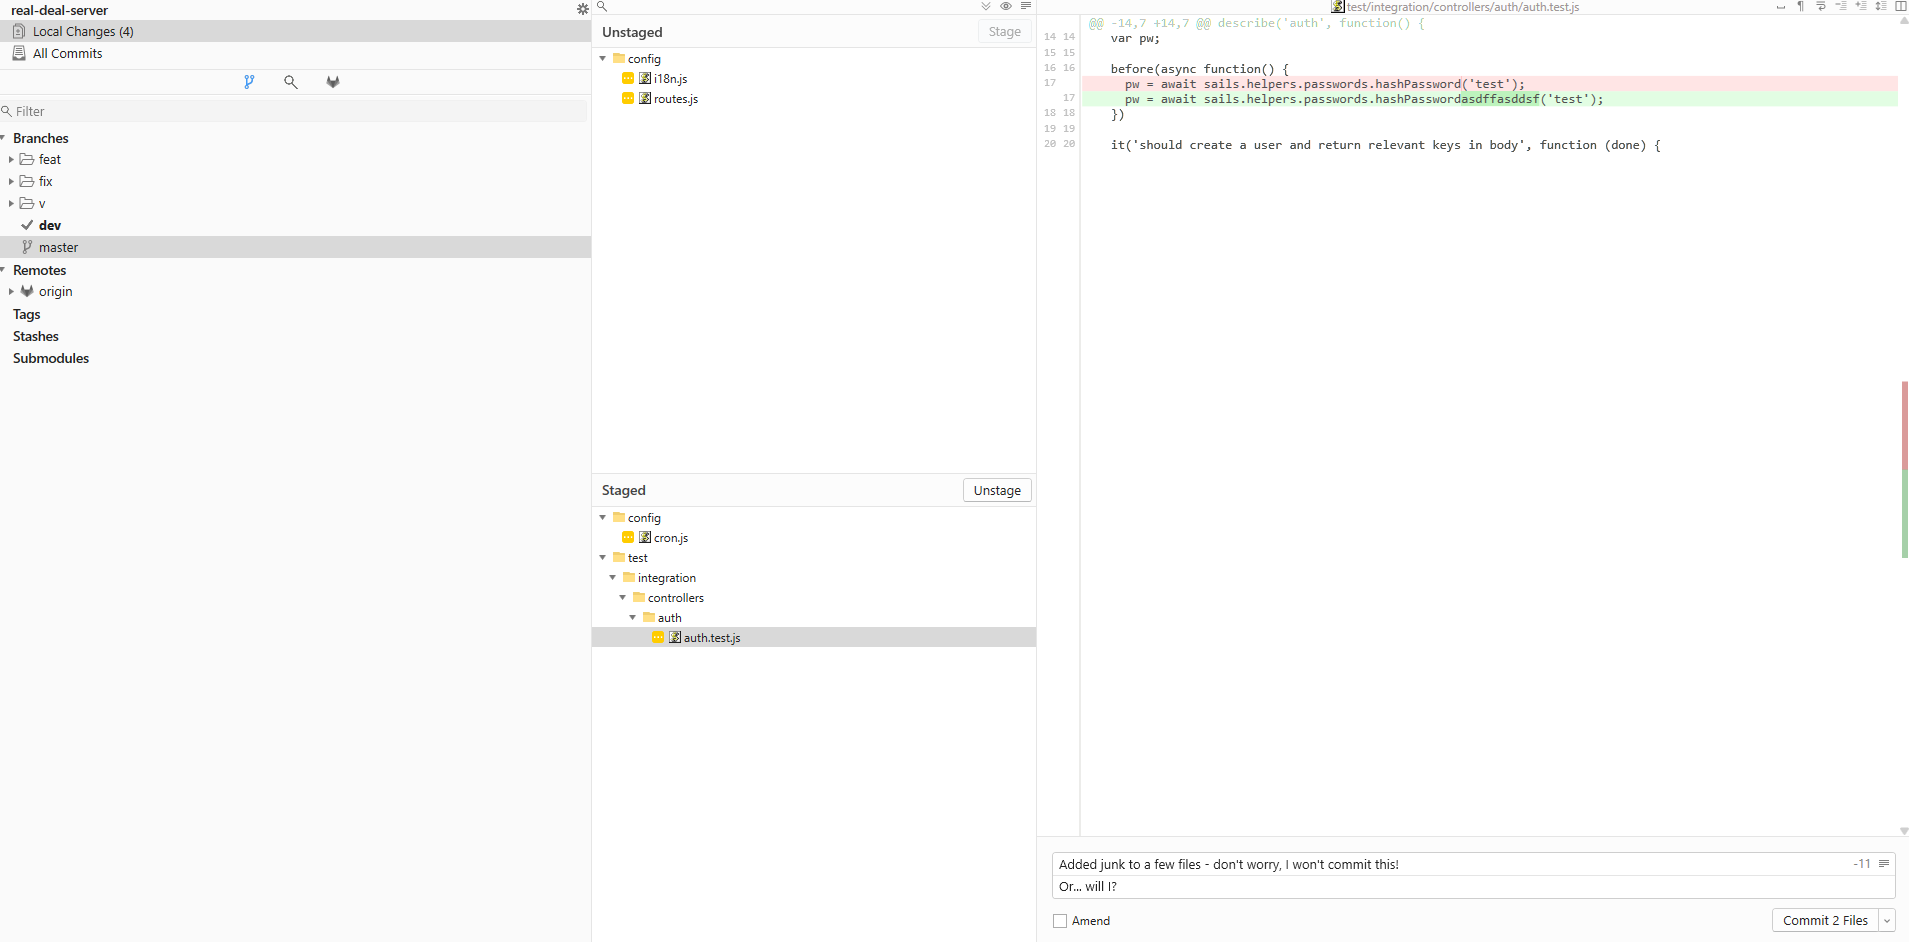
If you have a change that you don’t want to stage, you can right click the change and click ‘Discard changes…’ to discard all changes to that file. Or, if you want to keep working on a file, simply don’t stage it. Unstaged changes will be left as they are for a commit, so you can commit only the things you want and keep working on everything else.
Once you’ve staged all the changes you want to commit, enter a commit message and description in the bottom right, and click ‘Commit’. You’ve just made your first commit! Congratulations! Unfortunately, this commit only exists on your local machine, until you push it.
Pushing is very simple in Fork, simply click the push button, and your commit(s) will zoom off to the server, ready for everybody else to appreciate.
In Conclusion
So – now you know the basics of Git! Congratulations, you’re ready to jump in to your team and start making changes.
But, there’s a whole world of other things to learn out there. Some things you might want to learn about next are how to resolve merge conflicts, how to create and resolve pull requests, and how to stash changes. But, those are articles for later. For now, sit back and enjoy your newfound Git prowess!
We hope you enjoyed reading this! Have a question or want to chat more about game development? Reach out to us!
Other places you can find us:
- Our other game development resources
- Join our Discord server

Pingback: Git Basics 2.1 - How to Get Connected to GitLab | Dev Blog
Pingback: Git Basics 2.3 - How to Get Connected to Bitbucket | Dev Blog