Now that you have Git setup, the next important step is to connect to GitLab with your freshly downloaded copy of Fork.
If you have no idea what I’m talking about – it’s probably best to start with the previous part of this series.
Step One – Create your Access Token
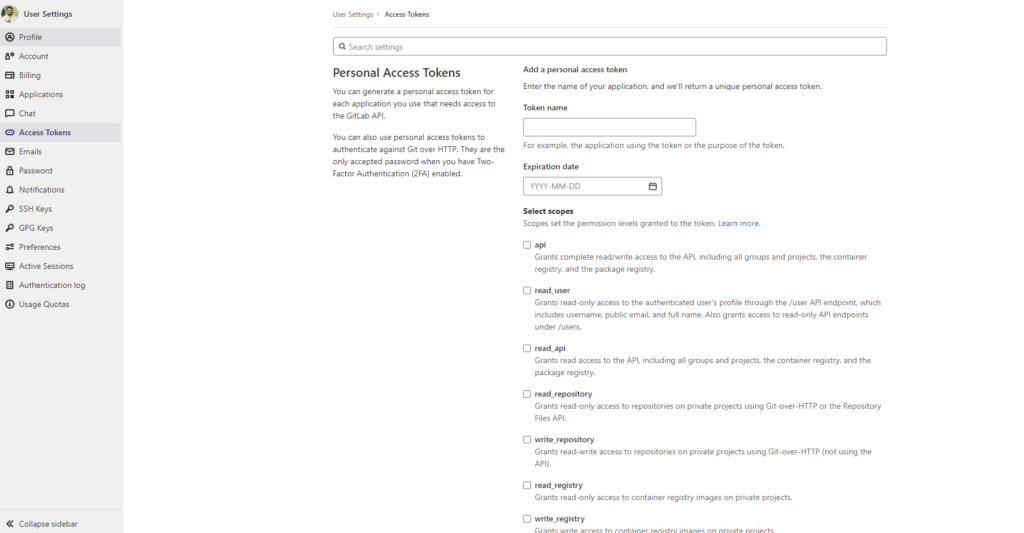
The first step is to create an Access Token. This is a key that GitLab uses to ensure it knows who you are, and that you only have access to the things you should have access to.
On GitLab, go to your account preferences, and select the Access Tokens settings. Enter a name for your Access Token (such as Fork Access Token) and an expiration date if you’d like to (or just leave it blank).
Next, you’ll need to select which permissions you want your access token to have. Each one is explained in brief on the page, and you may want to ask your technical lead for which ones you will need. Or – just go ahead and check all the boxes. You can always create a more locked-down Access Token later if you want to.
Once you’ve done this, click ‘Create Personal Access Token’. GitLab will create your access token, and this is the only time you’ll be able to see it, so don’t close this page until we’re done. Copy the token – we’ll be using it shortly.
Step Two – Integrate your Access Token
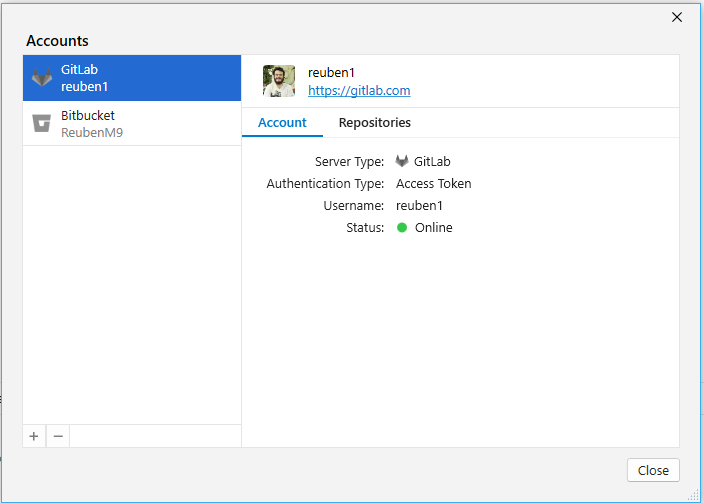
Open up Fork and do any basic setup you need to. The first time you open Fork it will ask you to set up your identity – this is the email and name that will be associated with your commits so enter it wisely.
Next, open your account settings (on Mac this is under ‘Fork’ > ‘Accounts…’, and on Windows you can find it at ‘File’ > ‘Accounts…’). Click the ‘+’ button to add a new account. We’ll be adding a GitLab account, so select that, and then enter your access token. Boom – you just connected GitLab.
Step Three – Clone your first repository
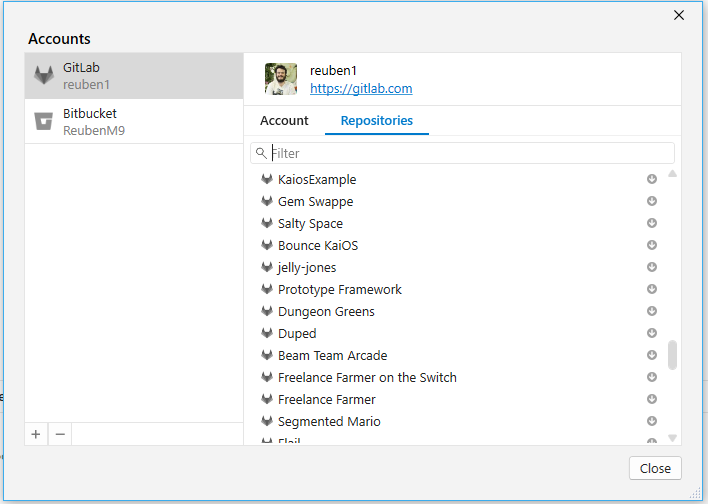
Now that you are connected to GitLab, you can view all of your GitLab repositories. If you open the account settings again you can select your new GitLab integration, and click the ‘repositories’ button to view all of your repositories.
Next to each repository is a little download button – clicking that will clone the repository to your default directory! Once you’ve cloned your first repository, you can continue on to the next part of this series, which will be going over some basics of how to manage your git repository!
We hope you enjoyed reading this! Have a question or want to chat more about game development? Reach out to us!
Other places you can find us:
- Our other game development resources
- Join our Discord server

Pingback: Git Basics 1 - How to set up Git | No Moss Studios