Ahhh GitHub. The OG Git server host – solid respect. So, here’s how to get connected to GitHub into your freshly installed copy of Fork.
If you have no idea what I’m talking about – it’s probably best to start with the previous part of this series.
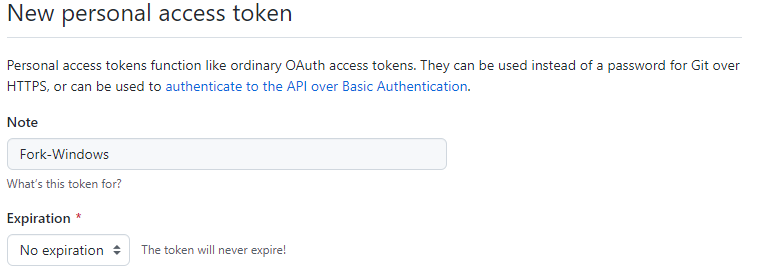
Getting your Personal Access Token
To integrate GitHub with Fork, there are two options. You can use OAuth (effectively logging in with your GitHub account), or you can use a Personal Access Token. I’ve tried using OAuth, but in my experience, it expires every few days, which means if you want to use it, expect to have to re-authenticate your account in Fork every so often – a bit of a chore.
For a more permanent implementation, while still being relatively simple, we’ll be going with the Personal Access Token strategy. A Personal Access token is a unique key that you generate that you associate with Fork. It will then use this key to tell GitHub that you are who you say you are, and that you should have access to all your repositories.
To create a Personal Access Token, you can head to this page. That link will pre-fill all the information you will need for your personal access token, so you can change the name (if you desire), change the expiry time (if you’d like to), and then click Generate Token.
Once you’ve generated your token, make sure you copy it. Once you close this tab, you won’t be able to see your token again. If you do accidentally close the page, you will have to revoke this token and generate another one for yourself.
Adding your token to Fork
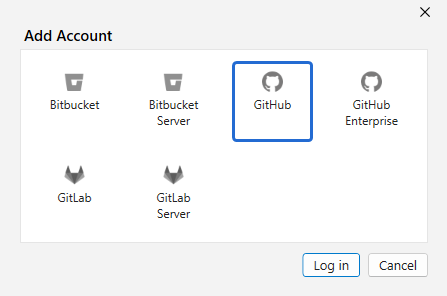
To add your Personal Access Token to Fork, you want to head to your Account tab. On Mac this is under ‘Fork’ > ‘Accounts…’, and on Windows you can find it at ‘File’ > ‘Accounts…’. From that page, select GitHub, and start the process.
On the dropdown, you want to select the ‘Personal Access Token’ integration method. Then, simply copy the token you’ve created into the window and hit ‘Sign In’. Done! You now have connected GitHub into your copy of Fork.
Now that that’s done, you can see that your account status has changed to integrated. On your Account page, you can also see the new ‘Repositories’ button on your GitHub integration. If you go there, you can see a list of all the repositories you have access to, and can click the little download button to clone it to your machine.
Once you’ve cloned your first repository, you can continue on to the next part of this series, which will be going over some basics of how to manage your git repository!
We hope you enjoyed reading this! Have a question or want to chat more about game development? Reach out to us!
Other places you can find us:
- Our other game development resources
- Join our Discord server

Pingback: Git Basics 1 - How to set up Git | Dev Blog